
My CladdingKing Cart
There are no more items in your cart

Over the years, we’ve helped thousands of customers transform their bathrooms with wall panels, and we’ve noticed something important…
When an installation goes wrong, it is rarely because of the cladding itself. The problems usually start before the first panel is even fitted.
A beautifully designed panel will only perform as well as the surface it is fixed to, the adhesive used, and the care taken during fitting.
Whether you are a confident DIYer or installing bathroom cladding for the first time, avoiding these common mistakes can be the difference between a professional-looking bathroom and a job that starts showing problems a few months down the line.
Here are the top five mistakes we see people make when installing bathroom cladding and how you can avoid them.
1. Installing Bathroom Cladding Onto An Unstable Surface (The Mistake We See Most Often)
One of the most common questions we get from customers is:
“Can I fit cladding straight over my tiles?”
The answer is often yes, but only if those tiles are securely fixed and provide a suitable surface to work with.
This is the mistake we see more than any other. Many people assume that because bathroom cladding can be fitted over tiles, the condition of those tiles does not matter.
But it does.
If tiles are loose, cracked, moving or poorly bonded to the wall, your cladding is only being fixed to an unstable surface. The adhesive may bond perfectly to the tile, but if the tile itself fails, the whole installation can be affected.
Think of it like fixing a strong hook to a wall with peeling paint. The hook might be excellent quality, but it cannot hold securely if the surface underneath is weak.
The 30-Second Bathroom Tile Check
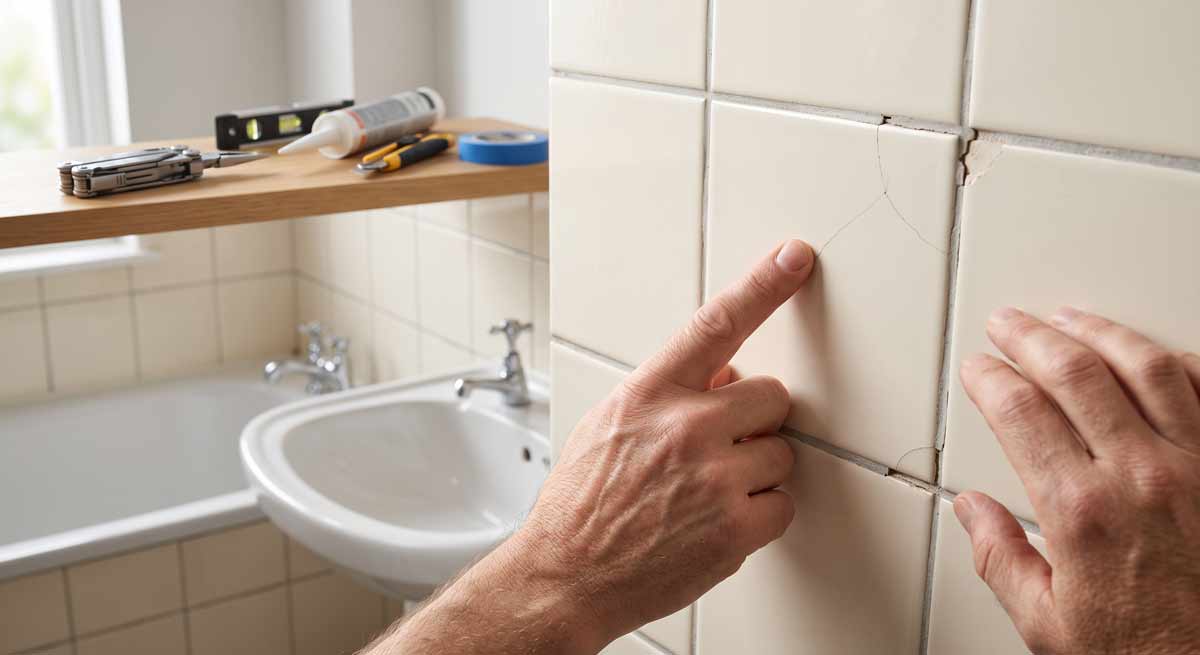
Before covering existing tiles, make sure you follow these simple checks:
- Tap tiles across the wall and listen for hollow sounds
- Push gently on larger tiles to check for movement
- Check grout lines for cracks
- Look for signs of previous water damage
- Remove anything loose before installing
If you’re unsure, it’s always better to remove a questionable tile now rather than risk fixing a whole bathroom twice.
A little extra preparation at the start can save hours of repairs later!
For more guidance, see our guide on preparing your bathroom walls before installing cladding.
2. Getting Measurements Wrong
It sounds simple, but inaccurate measurements are one of the most common causes of wasted materials and frustrating installations.
Bathroom walls are rarely perfectly straight. Corners can be slightly uneven, ceilings may not be level, and spaces around showers, windows and fixtures often require careful cutting.
A lot of installation mistakes happen before the first panel is even cut. Taking five extra minutes with your measurements can save you from ordering extra panels or ending up with awkward joins.
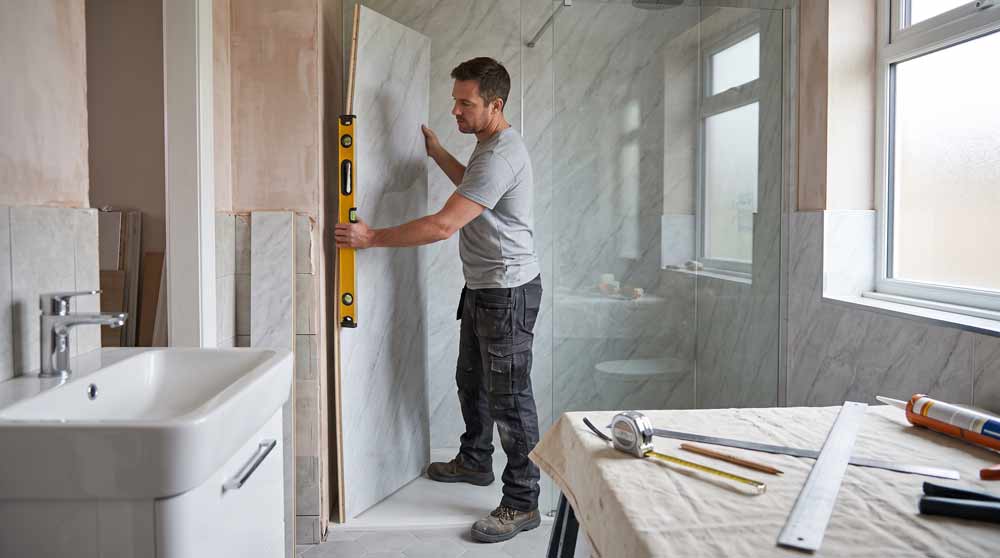
Measure Twice, Cut Once
Before ordering your panels, follow our advice:
- Measure the height and width of every wall
- Measure around windows, pipes, sockets and shower fittings
- Check whether your walls are straight
- Add a little extra material for trimming mistakes or unexpected issues
Remember, having one spare panel is far better than being halfway through a project and discovering you have made an incorrect cut.
Accurate planning also helps you decide where your joins will fall. A well-planned layout can make a bathroom look larger and give a much more professional finish.
3. Trapping Moisture Behind The Panels
Bathroom cladding is designed for bathrooms, but that does not mean the area behind the panels can be ignored.
One of the biggest misunderstandings with bathroom cladding is assuming that because the front of the panel is waterproof, anything underneath no longer matters.
It does.
Your cladding creates a protective barrier, but it is not designed to hide existing problems.
If moisture is already trapped behind the panels, or water finds its way behind poorly sealed joints, you can create the perfect conditions for mould, damp and long-term damage.
The key to a successful installation is making sure the wall behind your cladding is clean, dry and suitable before the first panel goes up.
Moisture Prevention Checklist
Before installing your bathroom cladding, work through this checklist to make sure your walls are ready for the job.
- Check your walls are completely dry
- Fix any damp, leaks or water damage before installation
- Remove any mould and treat affected areas
- Seal shower areas, baths and wet zones properly
- Protect vulnerable areas around joints, corners and edges
A little preparation before installation can prevent much bigger problems later.
4. Using The Wrong Adhesive
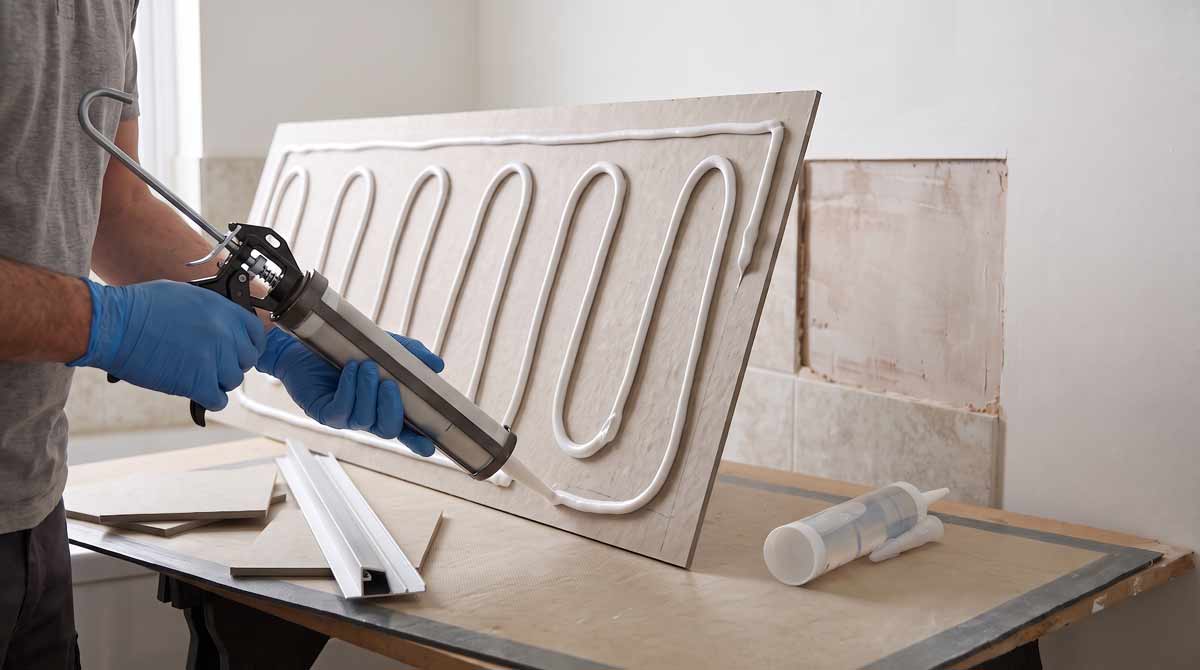
Not all adhesives are created equal.
This is one area where we always recommend doing things properly. The adhesive is not the place to cut corners, it is what holds your investment on the wall.
A common mistake is choosing an adhesive because it is cheap, convenient, or simply because it is already sitting in the garage.
Bathroom cladding panels are larger and heavier than many wall coverings, meaning they require an adhesive that is suitable for the job.
What Can Happen If You Use The Wrong Adhesive?
The adhesive may feel strong when first installed, but bathroom temperatures and humidity changes can expose weaknesses over time.
Using the wrong adhesive can cause:
- Panels slipping during installation
- Poor bonding
- Panels lifting away from the wall over time
- Gaps appearing between panels
Always choose an adhesive that is specifically designed for bathroom wall panels and suitable for the surface you are fixing onto.
The adhesive needs to work with both the wall and the cladding system.
Quality installation is about using the right products together, not trying to save a few pounds on materials that are responsible for holding everything in place.
5. Poor Alignment During Installation
Bathroom cladding is all about creating a clean, seamless finish, so even small alignment mistakes can stand out.
Your first panel is the most important one. If it is not straight, every panel that follows can become harder to align. Taking a few extra minutes at the start can save a lot of frustration later.
Cladding Alignment Checklist
Before you start your bathroom cladding project, take a few extra minutes to check the following:
- Start from the most visible wall where possible
- Use a spirit level before fixing your first panel
- Check your alignment regularly as you work
- Do not assume your walls are straight
- Take extra care around corners and trims
Good alignment is what helps transform a DIY installation into a finish that looks professionally fitted.
Is There Such A Thing As Bad Bathroom Cladding?
The answer is not as straightforward as you might think. While there are differences in quality between products, the biggest factor in how well bathroom cladding performs is rarely the panel itself, it's how it's installed and what it's fitted onto.
Even a high-quality cladding panel can fail if it's fixed to an unstable or uneven surface, or if the wrong adhesive and installation methods are used. Likewise, a well-made panel installed correctly onto a solid, stable wall can provide years of reliable performance.
For the best results, you need:
- A quality cladding product
- A stable, properly prepared surface
- The correct adhesive and installation materials
- Careful, accurate fitting
Good bathroom cladding should have a consistent finish, fit together securely and be designed to cope with the moisture and temperature changes found in bathrooms. But no panel, regardless of its price, can make up for poor preparation or an unstable wall.
Ultimately, it's not about choosing the most expensive cladding or the cheapest option. The key is making sure it's installed properly onto a solid, stable surface so you can enjoy a great-looking, long-lasting finish.
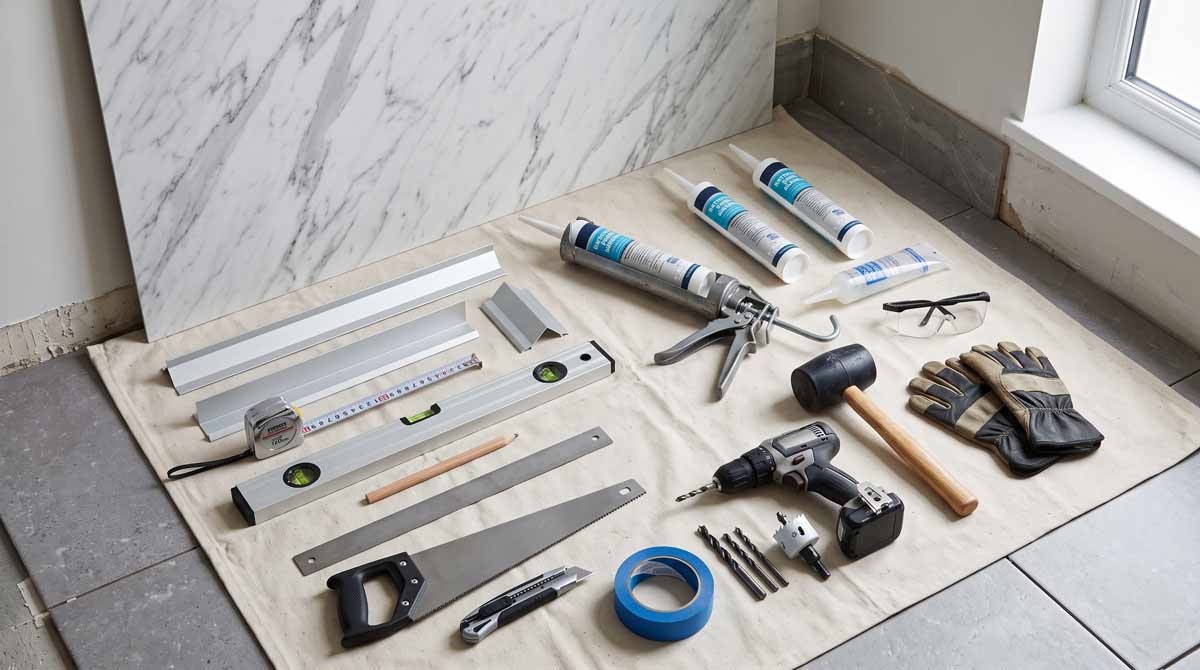
Don’t Pick Up The Tools Until You’ve Done These Simple Checks
Before you start your project, follow these simple bathroom cladding installation checks.
1. Inspect Your Panels When They Arrive
Do not wait until installation day to open your boxes.
Check your panels as soon as they arrive and look for:
- Any damage during delivery
- Scratches or marks
- Colour differences between panels
- Issues with the tongue-and-groove edges
If you notice anything that doesn’t look right, it’s much easier to sort it out before you start fitting your panels.
We always recommend checking your delivery before you start. If anything arrives damaged or isn’t quite right, let us know within 24 hours and we’ll help resolve it. For peace of mind, unopened and unused products can be returned within 28 days.
For more information, check out our returns policy.
2. Store Your Panels Correctly
Bathroom cladding panels should be stored flat and somewhere dry before installation.
Avoid:
- Leaving panels outside
- Storing them somewhere damp
- Leaning them against a wall for long periods where they could warp
Before you start fitting, let your panels get used to the room they’re going into.
Leaving them to acclimatise helps them adjust to the temperature and reduces the risk of issues during installation.
3. Prepare Everything Before You Begin
Have all your tools, trims, adhesive and measurements ready before starting.
Stopping halfway through because you are missing something can lead to rushed decisions and mistakes.
Everything You Need Before Starting Your Bathroom Cladding Project
From the panels themselves to the small tools that make the job easier, being prepared before you start can make a big difference to the final result.
Here’s a checklist to get you started:
- Bathroom cladding panels (make sure you have a little extra in case you have any mishaps!)
- Bathroom cladding adhesive
- Cladding trims
- Waterproof bathroom sealant
- Cleaning products and cloths
- Tape measure
- Spirit level
- Pencil and marker
- Straight edge or ruler
- Masking tape
- Fine-tooth saw or suitable cutting tool
- Drill and suitable drill bits
- Hole saw
- Rubber mallet
- Protective gloves
- Safety glasses
The Difference Between A Quick Fix And A Quality Finish
The bathroom cladding installations we see our customers most proud of are rarely the ones where they rushed. They are the ones where they spent time getting the basics right.
Our Biggest Takeaways
- The wall underneath matters more than people realise
- The first panel is the most important panel
- Preparation takes longer than installation
- Spending a little more on the right materials prevents expensive mistakes later
Get the foundation right, and your bathroom cladding can give you a finish that looks professional, performs well, and lasts for years.
Comments (0)